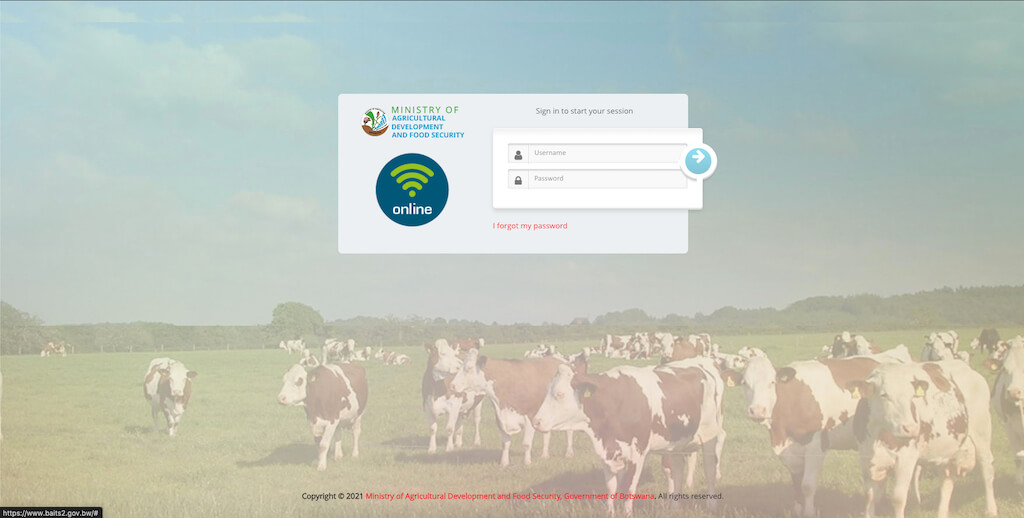
If you are looking for information on how to register your livestock on BAITS, then this tutorial is for you. Now you can keep and maintain a record of all activities you conduct on your livestock at your farm.
It is easy and you can do it yourself.
BAITS provides you with the capacity to maintain a file of all the management activities you will carry out on your livestock. This includes keeping a safe record of your animal’s age, gender, color, brands on the animal, and the vaccines applied to it over its lifespan.
You will also be able to apply for your animal’s change of ownership, request for its movement permit, and even record its death just by the click of a button. Only you can determine how much benefit you derive by your continued use of BAITS.
In this guide, we’ll show you all the steps you need to follow to register your livestock into BAITS.
But first, you need an account to use BAITS.
To create an account, visit any office of the Department of Veterinary Services near you. They will help you to create your account and issue you login details. You will be required to bring a certified copy of your Omang and your Keeper Card to create the account.
After you receive your login details, you can now proceed to the online platform to register your livestock.
Again, a Username and Password are issued to you by the Department of Veterinary Services. So, visit any of their offices near you.
To visit BAITS online, click here.
Then enter your provided Username and Password and click the arrow to log in.
You will be led to a dashboard, with the Main Menu on the left.
The Main Menu has on it the following tabs: Administration, Animal Movement, Arrivals, User Tag Keeper, Diseases, and IMPEX Permits.
ANIMAL REGISTRATION
To register your livestock, click on “Animal” on the Main Menu.
This will expand the menu and reveal “Animal Transaction” and “Animal Reports”.
Click on “Animal Transaction”, then select “Animal Registration” on the secondary menu that appears.
Then click “Add New”.
The process to register your livestock is made up of different sections which are: Animal Registration, Keeper and Animal Status Details, Tagging Details, Location Details, and Animal Details.
You start at Animal Registration.
Select “Single” if you are registering a single animal.
Otherwise, select “Bulk” if you are registering more than one animal.
(You can select “Read File” if you are uploading a file with all the details captured as per the system.)
Then, fill in your Keeper ID and Full Name.
KEEPER AND ANIMAL STATUS DETAILS
Proceed to “Brand” under the Keeper and Animal Status Details section, and select the brand on the animal.
Skip and do not fill any other fields, and proceed to the next section, Tagging Details.
TAGGING DETAILS
Next, in the Tagging Details section, skip and do not fill any fields, and move on to the Location Details section.
LOCATION DETAILS
In the Location Details section, there are two columns. Look for “Holding” on the right and type in the name of your mogotlha location. When you enter your Mogotlha location, all other fields will autofill.
Proceed to the Animal Details section.
ANIMAL DETAILS
In the “Animal Details” section, you start with “Brand Position”. Here you record where the branding has been placed on the animal. Then proceed on to fill “Species.”
Select “Bovine” if you are registering a cow or “Caprine” if you are registering small stock.
Fill in the “Animal Species Type” next.
Then skip and do not fill the “Animal Block Type.”
Proceed to enter the animal’s breed, gender, color, and age.
For “Age Type”, choose whether you are entering the animal’s age in the format of Months or Years.
You can then skip and do not fill the “Disease Status” as well.
Proceed to “Tag Number” and enter the ear tag number of the animal.
The EID Number will then autofill.
From here, click the “Add To List” button to add the animal to the table below the button.
Check if the animal is added to the table and that all the details captured are correct.
If all the details on the table are correct, then click “Save”. The “Save” button is located just above the table on the right.
Congratulations! You have successfully registered your animal on BAITS. It is that simple.
Now you can go on to register all your livestock and keep good records about all management activities you will conduct on each animal.
By continuing to use BAITS, you should see an improvement in how you handle and manage your livestock, which can lead to a successful farm operation.
Be sure to continue to interact with the offices of the Department of Veterinary Services near you.

